So the second week of my printing class introduced me to making a print with a linoleum block. You can see the results here.
The process involved finding an image (remember, I’m not that great with a pencil) and transferring it to a linoleum block, in this case a 5×7 unmounted block of battleship gray linoleum produced by Speedball. Then came the carving. My first time carving something that wasn’t a pumpkin and I can proudly say, I didn’t put out an eye (mine or anyone else’s) or lose a finger. Go me.
In class we picked inks, slightly thicker than what we used for the previous drypoint print, and used a brayer to spread it on the surface of the block. And then it was run through the press with the added pressure of some chipboard.
All in all, I’m enjoying this class quite a bit. There will be more linocuts in my future, and maybe some wood carving if I get really nuts.

Zebra in Orange

Zebra in Black
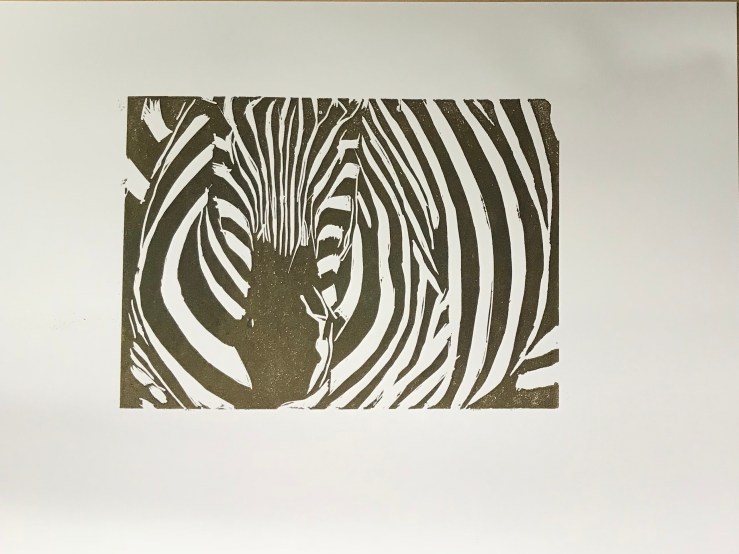
Zebra in Brown

Neat, really effective.
Thank you!
That’s awesome! Well done, Sir Charles!
Thank you, fair lady!
Well done. Your hand is steady enough – I wonder if you are as bad with a pencil as you think
I may be worse than I think, but probably not better.
good interplay of positive and negative (K)
Thank you. I have to give the zebra and the original photographer credit for the composition.
Inspirational. I hope you go for the woodcuts, too.
I’m thinking about it. Definitely need some sharper tools.
Looks great!
Are you sure this is only your second class? Your zebra is great.
Well thank you. But yes, just the second class. I had good source material.
It looks fab – I’m new to this printing lark, so could you please tell me how you transferred your image onto the lino? 🙂
Old school all the way. I used transfer/carbon paper.
Of course! I’d forgotten all about that stuff. Thanks v much. 🙂
You’re welcome! I’m just starting out myself so I’m happy to share the minuscule amount of info I have. 😊
Hehe! We novices have got to stick together… 🙂